


And it turned out so wonderful! I wanted to sleep on it last night, but Rick convinced me that might not be the best Idea! Before I go on though I have to thank my super handyman husband and my awesome friend Jamie... they saved me from some serious melt downs! So to cut the intensity with a knife... here she is!!!

Okay down to business. You will need the following to make the ottoman of your dreams:
-Coffee table (any size or shape)
-Saw
-Drill
-Foam
-Batting
-Spray adhesive
-Upholstery needles(that look KILLER! seriously!)
-Button kit
-Staple gun and Staples
-Upholstery Fabric
1. Acquire a table that fits the shape and size of your room. I got this one from D.I. for $20.

2. Take the top off. If you can find a table where the top is screwed on it works best.

3. Now you will have two separate pieces to work with. I did the bottom first, but you can do them in any order you like :) On the bottom we first sanded it down, due to the yucky thick and peeling paint. Then I primed it, and painted it black.

You will notice in this picture, the legs have been cut off. (sorry no picture of it with the full legs. haha that sounds so morbid!) Depending on how high you want your ottoman and what thickness of foam you use, you want to measure all of it and then cut off the extra hight from the legs. So for example... Our Table was 16 inches high. We wanted a 16 inch high ottoman. The foam we were using was 5 inches high. So we cut five inches off the legs to make it the height we wanted it! (hopefully that makes sense.)
After you cut it you will want to sand the edges of the legs, so that they are rounded and smooth!

thank you hubby!
Now you are done with the bottom! Hurray
4. On to the top! a.k.a. the fun part! So first thing you need to do is cut off the extra around the table top. So that it is the exact same size as the table bottom, hence getting rid of the table look. For us it was 1 inch on every side.

Look at rick go!
5. Drill holes in the top for the tufting. We wanted 9 buttons, so we did three across/ three down. Make sure you measure so it is nice and even.
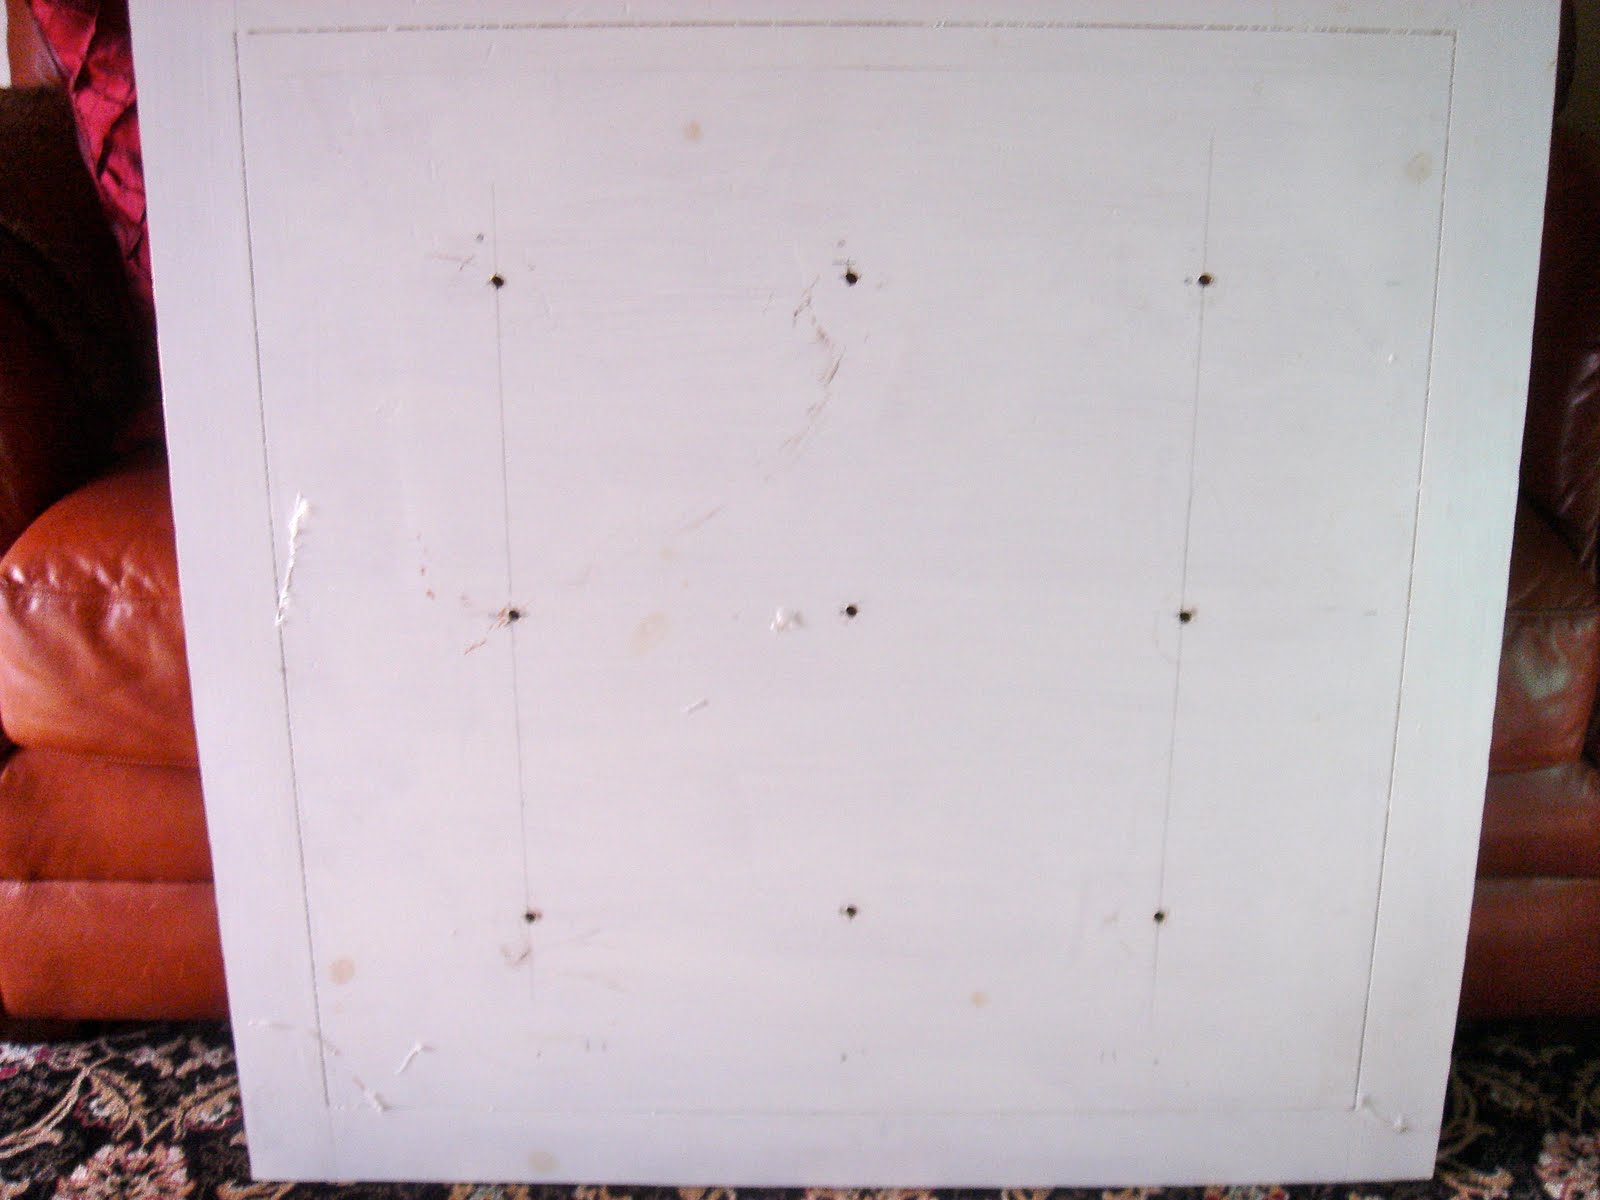
here is a close up.... you can see some of our markings. Trial and errors :)

*Note... the bigger your holes the easier your tufting! I wish we would have done them bigger!*
6. Are you still there? Sorry this is a long long post but it is worth it!! I promise!
Next measure your foam and place it on the board. I am not sure you are supposed to do this but I just cut mine with a bread knife. It was a little tricky but once I got it down... piece of cake!

7. Glue down your foam with spray adhesive.

8. Cover your foam with batting. Making sure you fill in any uneven area's around the sides.

9. Place your fabric over your foam and batting. and begin the tufting process. From here on out, make sure you have two people to work on this! SO MUCH EASIER! Because our holes were small.... it took 3 hours to tuft the stupid foam. I went into it thinking it would be done in about 30 minutes, boy was I wrong. So learn from my mistake and make your holes big! Next pull the thread tight and staple it in a zig zag pattern to keep it tight. We also sprayed some adhesive on the end to keep it from hanging.

10. Pull the fabric around the board really tight and staple it. Fold the corners like you would a present. and you are done! To make sure your top stays on sturdy we screwed the table back into the base!


The End!
It's great! It turned out so awesome! What's next? Table? couch? don't leave me hanging...
ReplyDeleteThanks :) WE will see haha It was so different than what I thought it was going to be like! My friend said doing chairs is sooo much easier than that though! Now Im curious to try!
ReplyDeleteYou are amazing with the things you change up & decorate!
ReplyDeleteThank you :) It has become an obsession haha!
ReplyDeleteThat truly is amazing! I have absolutely no confidence when it comes to projects... so intimidating! I am truly inspired! That turned out so pretty! Well done!!!
ReplyDeleteThis is a gorgeous redo and I love the fabric! Your husband and friend are awesome and this project looks great.
ReplyDeleteI absolutely love this! I have been searching yard sales and Craig's list for an ottoman, but nothing has jumped out at me. Now I have a direction! You inspired me.
ReplyDeleteThank-you!:-D